|
 |
|
| |
|
|
Red Hat Enterprise Linux 9 Essentials Book now available.
Purchase a copy of Red Hat Enterprise Linux 9 (RHEL 9) Essentials Red Hat Enterprise Linux 9 Essentials Print and eBook (PDF) editions contain 34 chapters and 298 pages
|
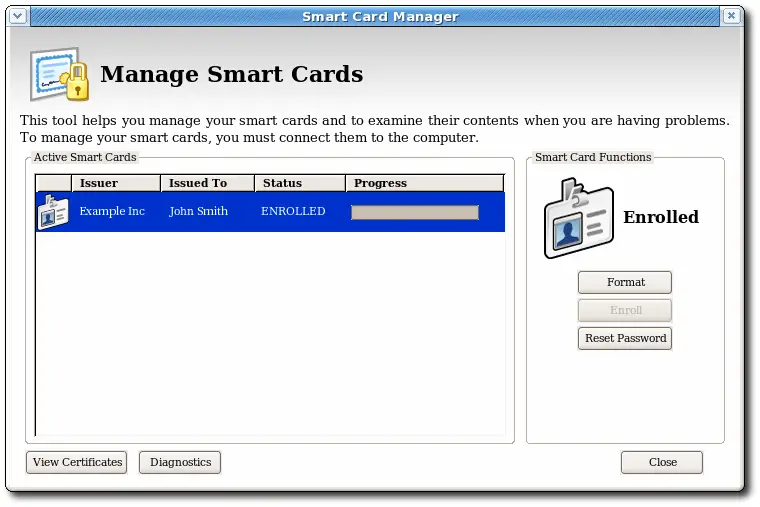
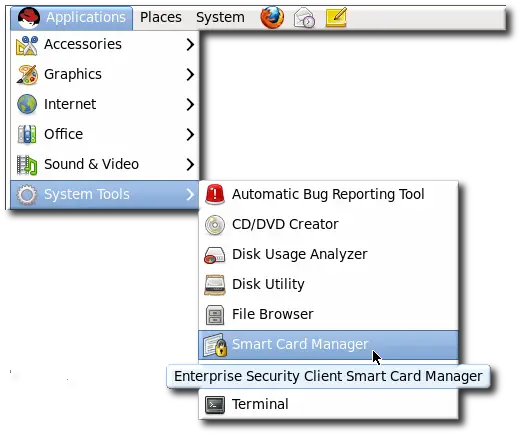
5.4. Managing Smart Cards
You can use the Manage Smart Cards page to perform many of the operations that can be applied to one of the cryptographic keys stored on the token.
You can use this page to format the token, set and reset the card's password, and to display card information. Two other operations, enrolling tokens and viewing the diagnostic logs, are also accessed through the Manage Smart Cards page. These operations are addressed in other sections.
Figure 5.1. Manage Smart Cards Page
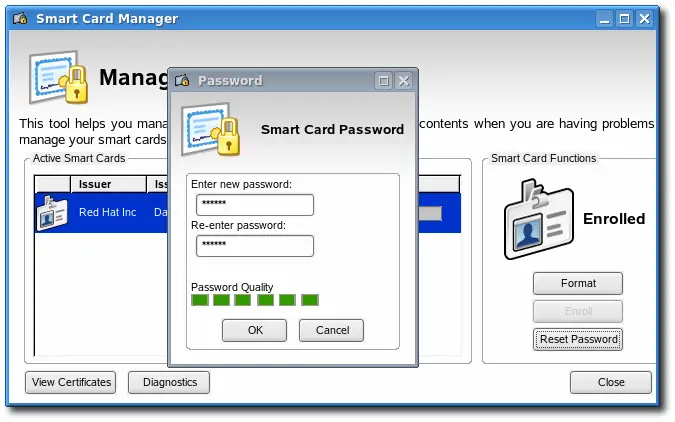
5.4.2. Resetting a Smart Card Password
If a user forgets the password for a smart card after the card is enrolled, it is possible to reset the password. To reset the password on a smart card:
-
Insert a supported smart card into the computer. Ensure that the card is listed in the Active Smart Cards table.
-
In the Smart Card Functions section of the Manage Smart Cards screen, click Reset Password to display the Password dialog.
-
Enter a new smart card password in the Enter new password field.
-
Confirm the new smart card password in the Re-Enter password field, and then click OK.
-
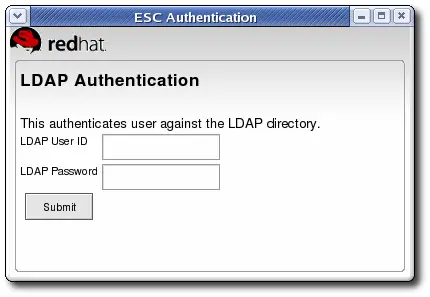
If the TPS has been configured for user authentication, enter the user credentials in the authentication dialog, and click Submit.
-
Wait for the password to finish being reset.
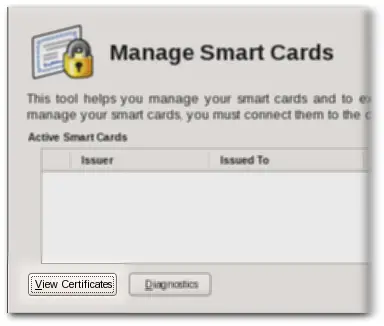
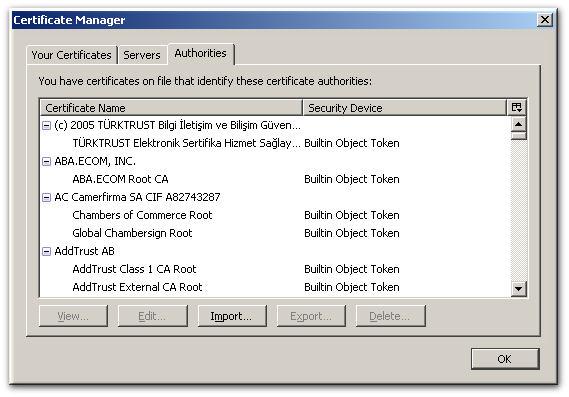
5.4.3. Viewing Certificates
The Smart Card Manager can display basic information about a selected smart card, including stored keys and certificates. To view certificate information:
-
Insert a supported smart card into the computer. Ensure that the card is listed in the Active Smart Cards table.
-
Select the card from the list, and click View Certificates.
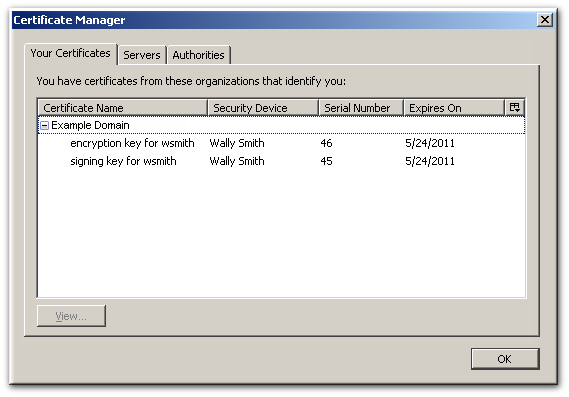
This displays basic information about the certificates stored on the card, including the serial number, certificate nickname, and validity dates.
-
To view more detailed information about a certificate, select the certificate from the list and click View.
5.4.4. Importing CA Certificates
The Xulrunner Gecko engine implements stringent controls over which SSL-based URLs can be visited by client like a browser or the Enterprise Security Client. If the Enterprise Security Client (through the Xulrunner framework) does not trust a URL, the URL can not be visited.
One way to trust an SSL-based URL is to import and trust the CA certificate chain of the CA which issued the certificates for the site. (The other is to create a trust security exception for the site, as in Section 5.4.5, “Adding Exceptions for Servers”.) Any CA which issues certificates for smart cards must be trusted by the Enterprise Security Client application, which means that its CA certificate must be imported into the Enterprise Security Client.
-
Open the CA's end user pages in a web browser.
https://server.example.com:9444/ca/ee/ca/
-
Click the Retrieval tab at the top.
-
In the left menu, click the Import CA Certificate Chain link.
-
Choose the radio button to download the chain as a file, and remember the location and name of the downloaded file.
-
Open the Enterprise Security Client.
-
Click the View Certificates button.
-
Click the Authorities tab.
-
Click Import.
-
Browse to the CA certificate chain file, and select it.
-
When prompted, confirm that you want to trust the CA.
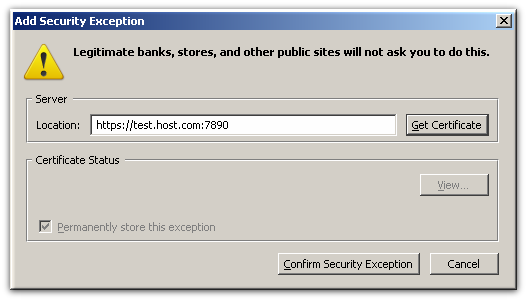
5.4.5. Adding Exceptions for Servers
The Xulrunner Gecko engine implements stringent controls over which SSL-based URLs can be visited by client like a browser or the Enterprise Security Client. If the Enterprise Security Client (through the Xulrunner framework) does not trust a URL, the URL can not be visited.
One way to trust an SSL-based URL is to create a trust security exception for the site, which imports the certificate for the site and forces the Enterprise Security Client to recognize it. (The other option is to import the CA certificate chain for the site and automatically trust it, as in Section 5.4.4, “Importing CA Certificates”.) The smart card may be used to access services or websites over SSL that require special security exceptions; these exceptions can be configured through the Enterprise Security Client, similar to configuring exceptions for websites in a browser like Mozilla Firefox.
-
Open the Enterprise Security Client.
-
Click the View Certificates button.
-
Click the Servers tab.
-
Click Add Exception.
-
Enter the URL, including any port numbers, for the site or service which the smart card will be used to access. Then click the Get Certificates button to download the server certificate for the site.
-
Click Confirm Security Exception to add the site to the list of allowed sites.
5.4.6. Enrolling Smart Cards
If you enroll a token with the user key pairs, then the token can be used for certificate-based operations such as SSL client authentication and S/MIME.
The TPS server can be configured to generate the user key pairs on the server and then archived in the DRM subsystem for recovery if the token is lost.
To enroll a smart card manually:
-
Insert a supported, unenrolled smart card into the computer. Ensure that the card is listed in the Active Smart Cards table.
-
Click Enroll to display the Password dialog.
-
Enter a new key password in the Enter a password field.
Confirm the new password in the Re-Enter a password field.
-
Click OK to begin the enrollment.
-
If the TPS has been configured for user authentication, enter the user credentials in the authentication dialog, and click Submit.
If the TPS has been configured to archive keys to the DRM, the enrollment process will begin generating and archiving keys.
When the enrollment is complete, the status of the smart card is displayed as ENROLLED.
5.4.7. Re-Enrolling Tokens
Commonly, a smart card will need to be re-enrolled while the certificates on it are still active. The smart card may be reused for a new user, or the certificates may be nearing their expiration date so the original user is having the smart card re-enrolled during the grace period.
The enrollment process does not automatically revoke active certificates, so enrolling a token without removing its active certificates will leave the old certificates active.
Before re-enrolling a token, the agent or officer must either manually revoke the certificates on the token or format the card again to return it to an unintialized state. Formatting a token automatically removes and revokes its old certificates.
|
|
|