|
 |
|
| |
|
|
Red Hat Enterprise Linux 9 Essentials Book now available.
Purchase a copy of Red Hat Enterprise Linux 9 (RHEL 9) Essentials Red Hat Enterprise Linux 9 Essentials Print and eBook (PDF) editions contain 34 chapters and 298 pages
|
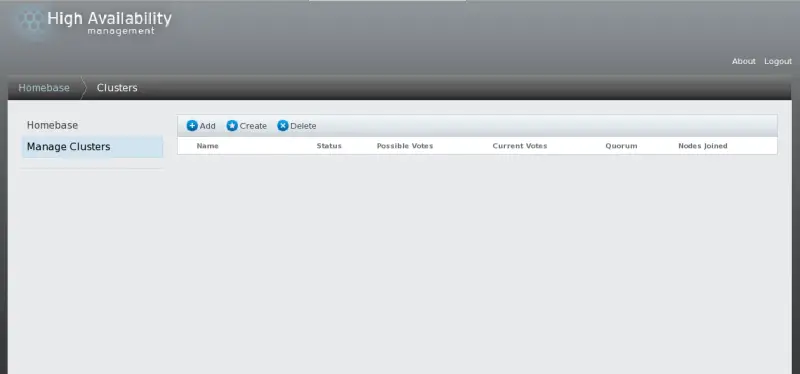
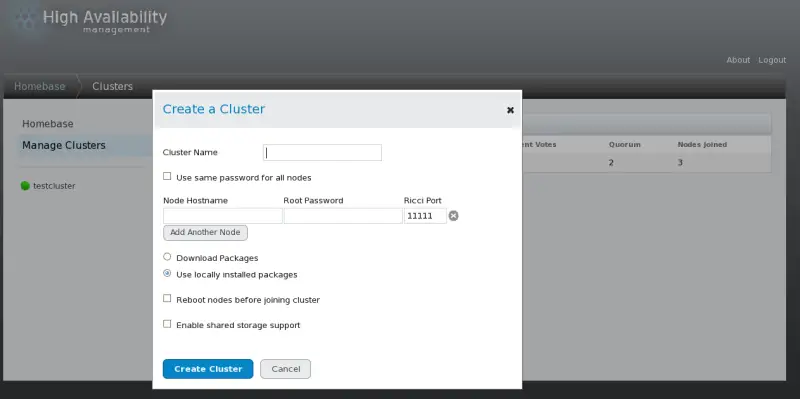
Creating a cluster with luci consists of naming a cluster, adding cluster nodes to the cluster, entering their passwords, and submitting the request to create a cluster. If the node information and passwords are correct, Conga automatically installs software into the cluster nodes and starts the cluster. Create a cluster as follows:
-
-
-
Enter the following parameters on the screen, as necessary:
-
At the text box, enter a cluster name. The cluster name cannot exceed 15 characters.
-
If each node in the cluster has the same root password, you can check to autofill the password field as you add nodes.
-
Enter the node name for a node in the cluster in the column and enter the root password for the node in the column. If you are using a different port for the ricci agent than the default of 11111, you can change that parameter.
-
Click on and enter the node name and root password for each additional node in the cluster.
-
If you do not want to upgrade the cluster software packages that are already installed on the nodes when you create the cluster, leave the option selected. If you want to upgrade all cluster software packages, select the option.
Whether you select the or the option, if any of the base cluster components are missing (cman, rgmanager, modcluster and all their dependencies), they will be installed. If they cannot be installed, the node creation will fail.
-
Select if clustered storage is required; This downloads the packages that support clustered storage and enables clustered LVM. You should select this only when you have access to the Resilient Storage Add-On or the Scalable File System Add-On.
-
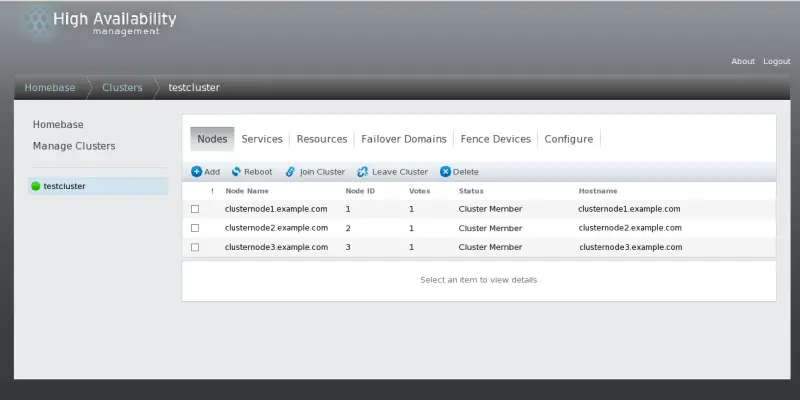
Click Submit. Clicking Submit causes the following actions:
-
The cluster software packages are downloaded onto the added node.
-
Cluster software is installed onto the added node (or it is verified that the appropriate software packages are installed).
-
The cluster configuration file is updated and propagated to each node in the cluster — including the added node.
-
The added node joins the cluster.
A message is displayed indicating that the cluster is being created. Refresh the page to see the current status of the cluster creation. When the cluster is ready, the display shows the status of the newly created cluster.
-
After clicking Submit to create the cluster, you can still add or delete nodes from the cluster by clicking the or function from the menu at the top of the cluster node display page. For information on deleting a node from an existing cluster that is currently in operation, see Section 4.2.4, “Deleting a Member from a Cluster”.
|
|
|