Follow Techotopia on Twitter

On-line Guides
All Guides
eBook Store
iOS / Android
Linux for Beginners
Office Productivity
Linux Installation
Linux Security
Linux Utilities
Linux Virtualization
Linux Kernel
System/Network Admin
Programming
Scripting Languages
Development Tools
Web Development
GUI Toolkits/Desktop
Databases
Mail Systems
openSolaris
Eclipse Documentation
Techotopia.com
Virtuatopia.com
Answertopia.com

How To Guides
Virtualization
General System Admin
Linux Security
Linux Filesystems
Web Servers
Graphics & Desktop
PC Hardware
Windows
Problem Solutions
Privacy Policy


34.3. Adding a Remote UNIX (LPD) Printer

To add a remote UNIX printer, such as one attached to a different Linux system on the same network, click the New button in the main Printer Configuration Tool window. The window shown in Figure 34-2 appears. Click Forward to proceed.

In the window shown in Figure 34-3, enter a unique name for the printer in the Name text field. The printer name cannot contain spaces and must begin with a letter. The printer name may contain letters, numbers, dashes (-), and underscores (_). Optionally, enter a short description for the printer, which can contain spaces.

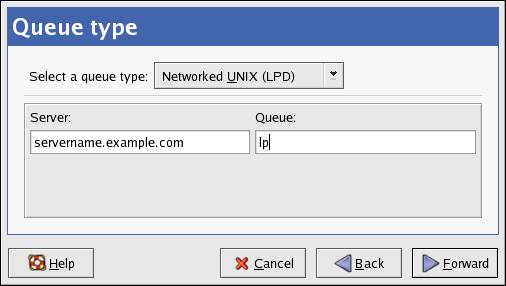
Select Networked UNIX (LPD) from the Select a queue type menu and click Forward.

Figure 34-6. Adding a Remote LPD Printer

Text fields for the following options appear:

  • Server — The hostname or IP address of the remote machine to which the printer is attached.

  • Queue — The remote printer queue. The default printer queue is usually lp.

Click Forward to continue.

Next, select the printer type. Refer to Section 34.7 Selecting the Printer Model and Finishing for details.

ImportantImportant
 

The remote print server must accept print jobs from the local system.


  Published under the terms of the GNU General Public License Design by Interspire