|
 |
|
| |
For a data source to be directly accessible from within an OOo document, it must first be registered as described below.
- Click File > Wizards > Address Data Source.
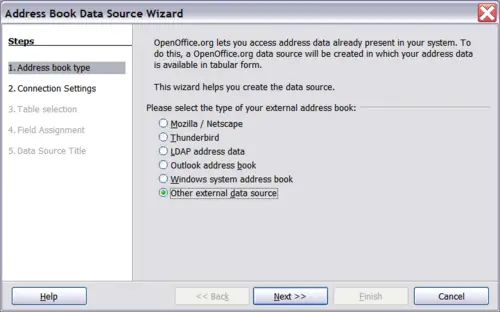
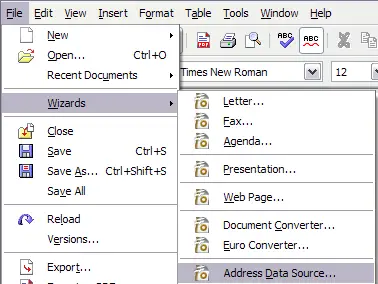 Starting the Address Data Source wizard - Select the appropriate type of external address book—in this case, Other external data source. (The choices on this page of the wizard vary with your operating system.) Click Next.
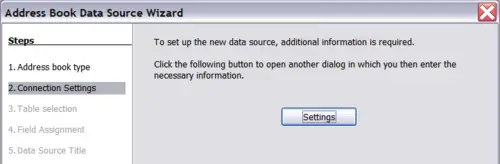
 Select type of external address book - On the next page of the Wizard, click Settings.
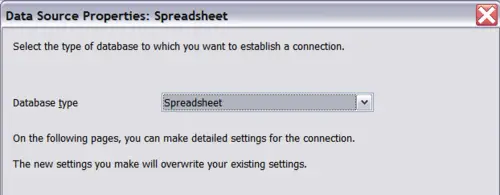
 Starting the Settings part of the Wizard - In the Data Source Properties dialog, select the Database type (in this case, Spreadsheet). Click Next.
 Selecting the database type - In the next dialog, click Browse and navigate to the spreadsheet that contains the address information. Select the spreadsheet and click Open to return to this dialog. At this time you may wish to test that the connection has been correctly established by clicking on the Test Connection button (not shown in illustration).
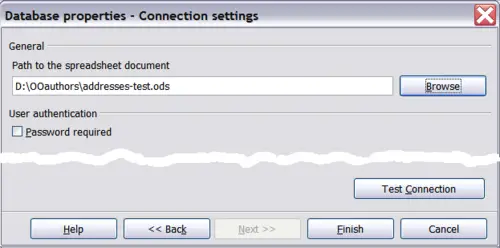 Selecting the spreadsheet document - Click Finish.
- In the following dialog, click Next. (Do not click Field Assignment.)
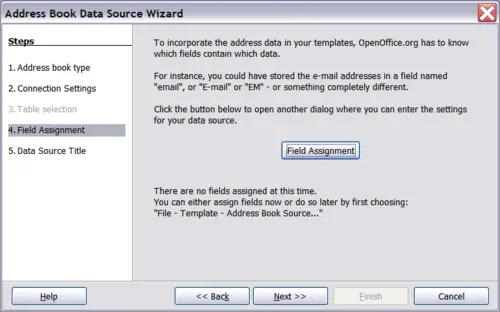 Because this is a spreadsheet, do not click Field Assignment. - Name the file in the Location field. The default is ...\Addresses.odb; but you may replace Addresses with another name if you wish. You may also change the name in the “Address book name” field. In our example, the name “Points” was used for both.
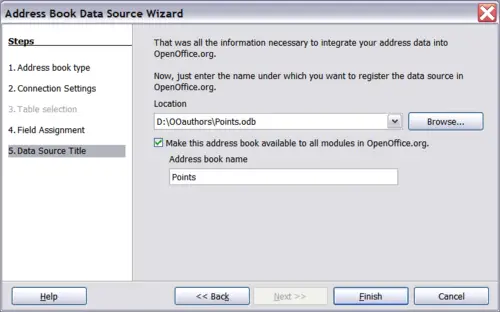 Name the .odb file and the address book. - Click Finish. The data source is now registered.
|
|
|


