Using AutoCorrect to create a table
You can also create a table by typing a series of hyphens (-) or tabs separated by plus signs. Use the plus signs to indicate column dividers, while hyphens and tabs are used to indicate the width of a column.
For example, this character sequence:
+-----------------+---------------+------+
creates a table like this:

 | This function can be disabled or enabled in Tools > AutoCorrect. On the Options tab, deselect or select Create table.
|
 | When using tabs instead of a table to line up your data, always make sure that you know how wide they are set and remember that default tabs may be different when the document is displayed on a different computer or even when copying the same data in a new document.
|
Create a table from formatted text
It is possible to create a table starting from plain text by means of the Table > Convert > Text to Table menu. In order for this command to work effectively, the starting text needs to have clear demarcation between what will become the columns of the table. Paragraph marks indicate the end of a row.
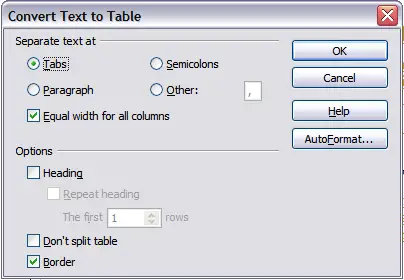
To convert text to a table, start by selecting the text you want to convert and select Table > Convert > Text to Table to open the dialog box shown below.

Dialog box to configure the text to table conversion
In the top part of the dialog box, select the symbol that separates the columns. This would normally be a tab, but it could be a semicolon or comma if you are importing a CSV file. The other options in this dialog are the same as those in the dialog used to insert a table shown in Figure 1.
Example
In this example we will convert the following text into a table.
Row 1 Column 1; Row 1 Column 2; Row 1 Column 3
Row 2 Column 1; Row 2 Column 2; Row 2 Column 3
In this case, the separator between elements is a semicolon. By selecting the text and applying the conversion, we obtain the following result.
| Row 1 Column 1
| Row 1 Column 2
| Row 1 Column 3
|
| Row 2 Column 1
| Row 2 Column 2
| Row 2 Column 3
|
Note that, unlike when creating a table with other mechanisms, the conversion from text to table preserves the paragraph style applied to the original text.
You can also use the Convert menu to perform the opposite operation; that is, to transform a table into plain text. This may be useful when you want to export the table contents into a different program.
To transform a table into text, place the cursor anywhere in the table, select Table > Convert > Table to Text in the main menu, pick the preferred row separator, and click OK to finish.
