Creating graphics styles
As discussed above you cannot create new presentation styles. You can create a new graphics style in two ways:
- Using the Style dialog box
- From a selection
Creating a new style using the Style dialog box
Choose the Graphics icon at the top of the Styles and Formatting window.
To link a new style with an existing style, first select that style, and then right-click and select New.
When styles are linked, then when you change the base style (for example, by changing the font from Times to Helvetica), all the linked fonts will change as well. Sometimes this is exactly what you want; other times you do not want the changes to apply to all the linked styles. It pays to plan ahead.
The style dialog box is shown below. It has 14 tabs, each with several options. If you are familiar with styles in Writer, you will find that you already know how to set many of these options. When you are finished making changes, click OK to save those changes.
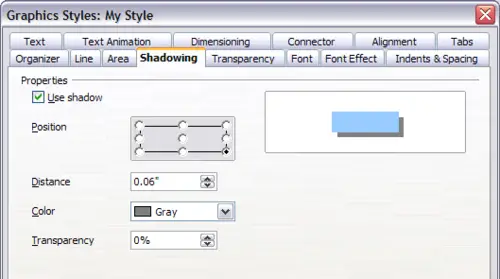
Dialog box to create a new graphics style
Creating a new style from a selection
You can create a new style from manually formatted text or graphics:
- Select the item you want to save as a style.
- In the Styles and Formatting window, click the New Style from Selection icon, highlighted in the figure below.
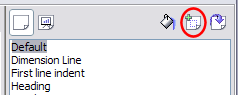
New Style from Selection
- In the Create Style dialog box that pops up, type a name for the new style. The list shows the names of existing custom styles of the selected type. Click OK to save the new style.
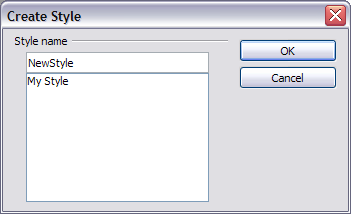
Naming a new style created from a selection


