Modifying a table
Once the table is added to the slide, you can control its appearance, size, position and so on using a combination of the task pane options, the table toolbar and the Table properties dialog box.
Task pane options
The following options are available in the Show section of the task pane:
- Header Row: Selected by default, it adds a first row with a different background from the rest of the table.
- Total Row: the opposite of Header row, if selected changes the background of the last row to make it stand out from the other rows.
- Banded Rows: selected by default, this option colors alternate rows with different backgrounds making it easier to ready data presented in rows.
- First Column: Highlights the first column of the table by allocating a darker background to it.
- Last column: same as first column, only applied to the last column.
- Banded Columns: when selected alternate columns are colored differently.
Table toolbar
When a table is selected (you can tell by the presence of 8 blue square handles around the edges), the Table toolbar should be displayed. If necessary, you can open the toolbar using View > Toolbars > Table. By default the toolbar will float, but you can at any time dock it to the side or top of the work area.

The Table Toolbar
1 Create Table | 7 Merge Cells | 13 Insert Row
2 Line Style | 8 Split Cells | 14 Insert Column
3 Line Color (border) | 9 Optimize | 15 Delete Row
4 Borders | 10 Top alignment | 16 Delete Column
5 Area style filling | 11 Center alignment | 17 Table design
6 Available fillings | 12 Bottom alignment | 18 Table properties
The Table toolbar contains the majority of the tools you need to manipulate a table; these are described below.
Table
Use to create a new table on the selected slide. Opens the Insert Table dialog box where you can select the desired number of rows and columns. Click on the small black triangle next to the button to open the graphic tool for inserting a table. To use the tool, move the mouse to the right and down in the grid until you reach the cell you want to be the last and click there.

Creating a 5x4 table with the graphic tool
Line Style
Use to change the style of the line of the selected cells. Opens a new dialog box where you can choose among a wide number of predefined styles.
Line Color
Open a color swatch dialog box where you can select the color of the lines for the selected cells.
Borders
Use to select among some predefined borders configurations. The borders are applied to the selected cells. If the desired border pattern is not available, you will need to use the Table properties dialog box.
Area filling
Choose first in the drop-down menu how the selected cells should be filled: Invisible, Color, Gradient, Hatching, or Bitmap. Depending on the selection, the Available Fillings drop-down menu is populated with the available schemes. Refer to
Chapter 6 (Formatting Graphic Objects) for a detailed description on how to manage area filling styles.
Merge cells
Merges the selected cells. Note that the contents of the merged cells are also merged.
Split cells
The opposite operation of Merge cells. Make sure that the cursor is positioned on the cell you want to split, then click to open the Split Cells dialog box.
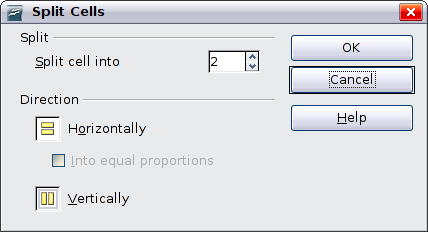
Split cell dialog box
Select the number of resulting cells from the split as well as whether the cell should be split horizontally or vertically. When splitting horizontally, you can select the “into equal proportions” option to get all cells of equal size. The contents of the split cell are kept in the original cell.
Optimize
Distributes evenly the selected cells either horizontally or vertically. If you want to optimize the whole table, you can distribute rows or columns evenly by right-clicking on the table edge and selecting Row > Space Equally or Column > Space Equally from the pop-up menu.
Vertical Alignment
You can select the vertical alignment of the text on a cell by cell basis between Top, Center and Bottom. The chosen setting only applies to the selected cells. The alignment commands can be applied to all the cells of the table by right-clicking on the edge of the table, choosing Cell from the pop-up menu, and then choosing the required alignment.
Insert or delete rows and columns
Use the Table toolbar to insert or delete rows and columns of your table. Rows and columns are inserted below and to the right of the selected cell. You can insert rows and columns at the end of the table using the pop up menu that opens right clicking on the edge of the table. The insert commands are under the Row or under the Column menu.
Table Design
The only purpose of this button is to open the Table Design pane in the task pane.
Table properties
Click the Table Properties icon to open the Format Cells dialog box.
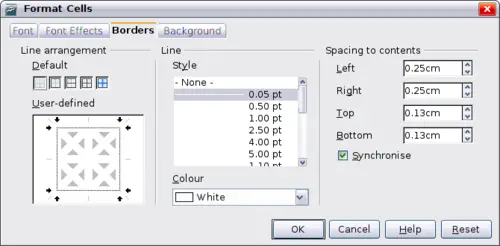
The Format Cells dialog box showing the Borders page
This dialog box contains the following pages:
- Font: see
Font page for a description of the available options.
- Font Effects: see
Font Effects page for a description of the available options.
- Borders: here you can set advanced properties not available from the Table Toolbar, such as the spacing between the text and the border as well as setting the style of each individual border of the table separately. This page also provides the same options as the line style, line color buttons of the Table Toolbar.
- Background: changes the background of the selected cells and provides the same functionalities of the Area Style Filling and Available Filling drop down menus of the Table Toolbar.
 | The Table Properties dialog box can also be accessed from the pop-up menu that opens when right-clicking on the table.
|
Position and size
Tables are treated in Impress just like any other graphic object; it is therefore possible to modify their position on the slide as well as their size either using the mouse or, for more accurate control, with the Position and size dialog box. You can open the dialog box by pressing F4 when the table is selected or by right-clicking on the table and then selecting Position and Size from the pop-up menu. The functionalities provided in this dialog are described in Chapter 6 (Formatting Graphic Objects).
|
| Unlike other graphic objects, it is not possible to rotate a table.
|


