|
 |
|
| |
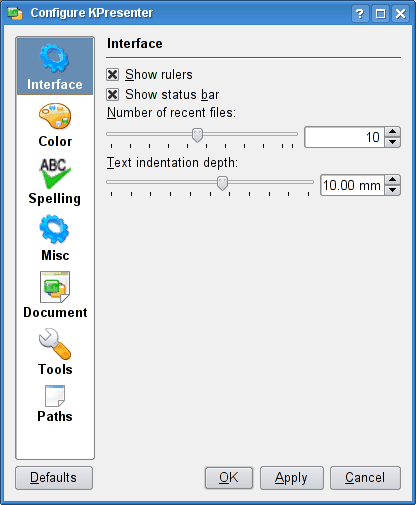
The
Configure KPresenter
Dialog
-
Show rulers
-
This is checked by default and both a vertical and horizontal
ruler are shown on KPresenterslides. When unchecked, the rulers are not shown
anymore on any slide.
-
Show status bar
-
Toggle the statusbar which is shown by default.
-
Number of recent files:
-
Set the number of recent files which will be opened using the
->
menu. Default is to remember 10 filenames. The
maximum you can set is 20 and the minimum is 1.
-
Text indentation depth:
-
This setting is used in the
menu by
and
menu items to change the indentation depth. Default is 1 centimeter.
-
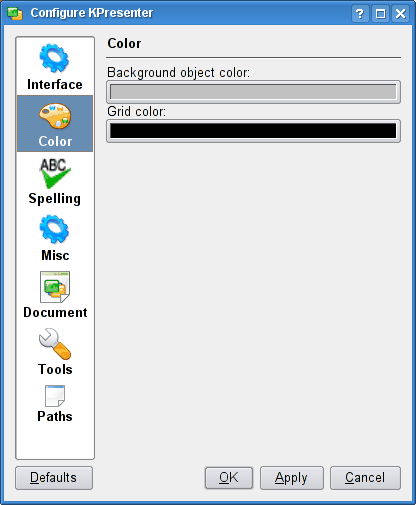
Background object color:
-
It changes the background color of the text box. The Text boxes background is white by default. If you had a dark
background color and you wanted to put some white text over it, you
could color the text box so that you could see what you were
typing. When you have finished, the area around the text would revert
to whatever the background color was. The
Defaults
button restores the original
settings.
-
Grid color:
-
You can change here the grid color which is black as default.
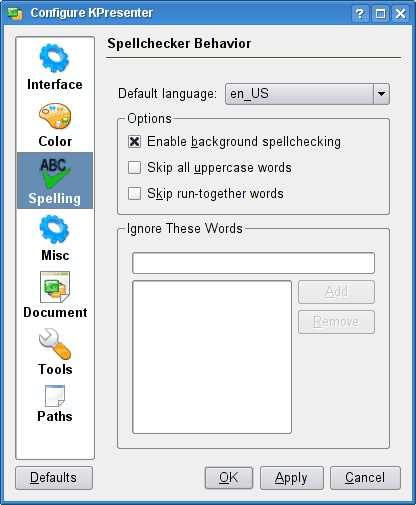
This tab defines the spellchecker behavior.
-
Default language:
-
You can choose here the language for the spellchecker. The languages listed come from aspell so if you want more spelling support languages, you should install the corresponding aspell-ISO packages.
-
Enable background spellchecking
-
If it is checked, it will highlight in red mispelled words according to the dictionary selected above and it will spellcheck words as you type them. This is enabled by default. This option has the same effect as
->
->
and both are checked/unchecked at the same time.
-
Skip all uppercase words
-
If this option is checked, the all uppercase words will not be checked for spelling. This option is also used when you choose the
->
->
menu option.
Tip
This is useful if the document you are working on uses a large number of acronyms. If this box is left unchecked, most of those acronyms will be incorrectly marked. By placing a mark in this checkbox, KPresenter will not mark the acronyms as misspelled.
-
Skip run-together words
-
If checked, then concatenated words made of existing words are not spellchecked. This is useful in some languages. This option is also used when you choose the
->
->
menu option.
Examples of such words are
shutout
,
cannot
and
blackout
.
Tip
Checking this box will help prevent KPresenter from
flagging website and email addresses for spelling errors. These
addresses often contain words run together.
-
Ignore These Words
-
You can have here a list of words you want to ignore in all spellchecking.
-
Add
-
Write a word in the field then click on the
Add
button to add it in the list. Once the word is added in the list, even if you click the
Cancel
button of the configuration dialog, it will stay in the list.
-
Remove
-
Highlight a word in the list then click on this button to remove it.
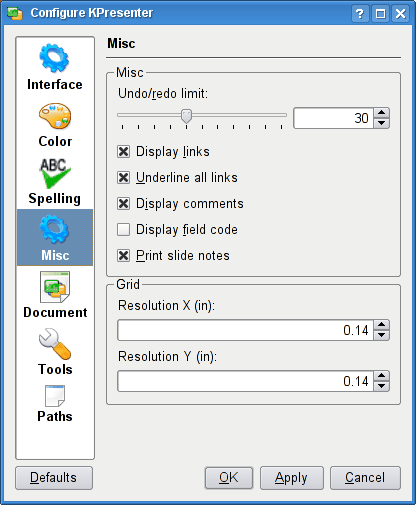
Misc
-
Undo/Redo limit:
-
Set the number of actions you can undo and redo (how many actions KPresenter keeps in its Undo buffer). Default is 30. Maximum is 60 and minimum is 10. Any action that exceeds the number set will be forgotten.
-
Display links
-
When you want to include a link in your slide, you will use the
->
menu which allows you to insert URL, mail or file links. If the option
Display links
is checked, all links will be displayed in a different color. This makes document links visible. This is the default behavior. If the option is unchecked, the link will be the same color as the text color. The links are visible (or not) both in the edited slides and in the slide show. A displayed link:
 A non displayed link:

-
Underline all links
-
If this is checked, all links will be underlined. The option is checked per default. If it is not checked, the link will not be underlined. A displayed and underlined link:

-
Display comments
-
Comments are inserted in the text at the cursor using the
->
menu. Comments can only be viewed in editing mode and not in the slide show. If this option is checked (default) then each comment will be shown as a small yellow rectangle. You can then right click on it to edit it, remove it or copy its text. A displayed comment:

-
Display field code
-
In editor mode (not in slide show) this option will display all the variable codes. This is very useful to see what variable is displayed. Variables are inserted using the
->
menu.
-
Print slide notes
-
If checked, all notes will be printed on paper. The notes will all be printed on a separate last page, from slide one to the last slide and finishing with the Master Page Note. You can see the notes for each slide using the
->
menu.
Grid
-
Horizontal grid size:
-
Set the space in centimeters between two points on an horizontal line on the grid. Default is 0.5 centimeter.
-
Vertical grid size:
-
Set the space in centimeters between two points on a vertical line on the grid. Default is 0.5 centimeter.
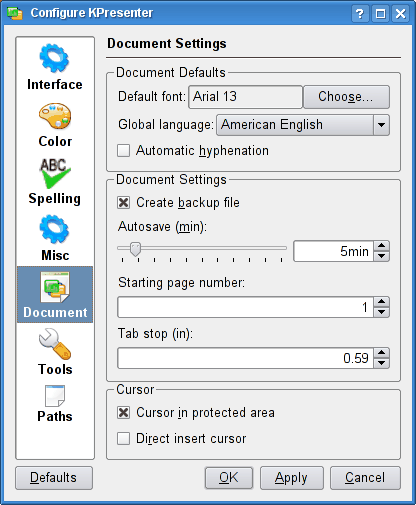
Document Defaults
-
Default font:
-
Click on the
Choose...
button, and a new dialog will appear. Use this dialog to choose the default font. This setting determines the default font used by KPresenter until further formatting is done. You can revert any text to this default by selecting
->
from the menubar.
-
Global language:
-
Use this drop down box to determine the default language for the document. This setting is used by the hyphenation and spelling tools.
-
Automatic hyphenation
-
Check this box if you want KPresenter to automatically hyphenate long words when it determines the word wrap in text frames. This is not set as default.
Document Settings
-
Create backup file
-
If checked, this will create a .<name>.odp.autosave.odp in the dir where your file is. This backup file can then be used in case of a problem. The backup file is updated everytime you save your document or everytime there is an autosave.
-
Autosave (min):
-
You can use this to adjust how often KPresenter saves a temporary file. If you set this value to
No autosave
, KPresenter will not autosave. You can adjust the autosave from 1 minute to 60 minutes.
-
Starting page number:
-
You can change here the number for the first page. It is set to 1 per default.
Tip
This is helpful if you have split a single document into multiple files.
-
Tab stop:
-
Each KPresenter document has a default set of tab stops. If you add tab stops to your document, the newly added tab stops override the default tabstops. You can use this text box to define the spacing between default tab stops.
As an example, if you enter 1.5 in this text box, and the unit of measure is in centimeters, then the first default tab stop will be located 1.5 cm to the right of the left margin of the frame. The second default tab stop will be located at 3 cm from the left margin, etc.
Cursor
-
Cursor in protected area
-
When this box is checked and you click in a protected frame of your document, a cursor appears. When the mark is removed from this check box, and you click in a protected frame, there is no cursor visible.
-
Direct insert cursor
-
When this box is checked then you can select a section of text using your mouse. Move the mouse to a new place in your document and click once with the middle mouse button and a copy of the selected text is copied and pasted to the new location in the document.
When there is no mark in this checkbox, in order to copy text from one section to another, you must select the text, manually copy the text in to the clipboard, then manually paste the text in the new location.
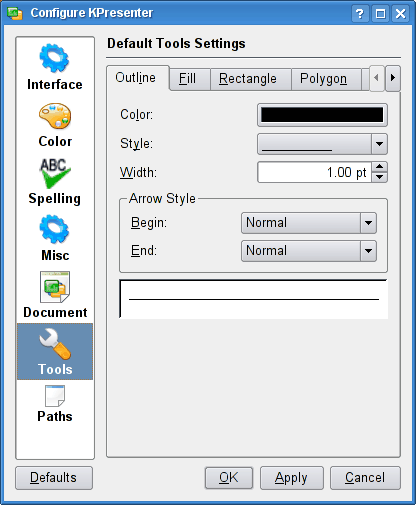
This dialog sets the default tools settings. There are 5 tabs in this dialog.
This is used in the
->
menu.
-
Color:
-
Set the color of the line. Clicking on the color will bring the standard KDE
Select Color
dialog.
-
Style:
-
Choose the line style from
No Outline
which will not draw any line to dotted lines and plain line.
-
Width:
-
Set the width of the line.
-
Arrow Style
-
Set the styles of the beginning and the end of your line for example you can choose an arrow at the end and a square dot at the beginning.
The last field displays a preview of your settings.
-
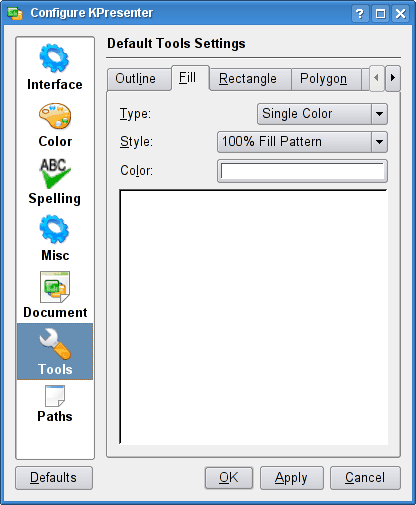
Type:
-
You can choose between
Single Color
,
Gradient
or
Transparent
as the type.
-
Style:
-
Choose the style or the pattern.
-
Color:
-
Choose the color. White is the default one. Clicking on the color will bring you the standard KDE
Select Color
dialog.
The last field displays a preview of your settings, provided the color is not white!
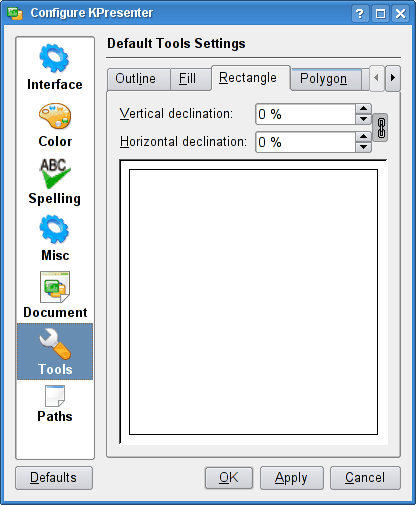
This is used in the
->
->
menu.
You can choose to keep the same ratio for the two settings below by having the
 icon or to separate the two settings by using the
 icon.
icon.
-
Vertical declination:
-
Set the vertical declination.
-
Horizontal declination:
-
Set the horizontal declination.
The last field displays a preview of your settings.
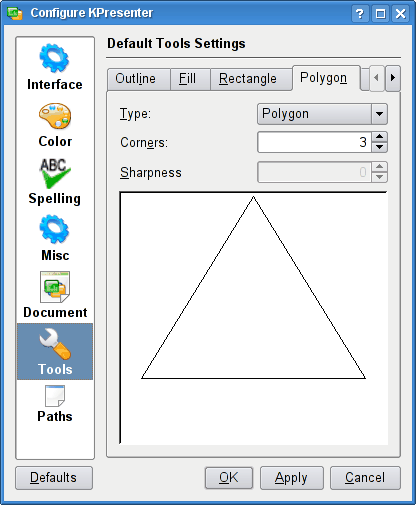
This is used in the
->
->
menu.
-
Type:
-
You can choose
Polygon
or
Convex/Concave
.
-
Corners:
-
Set here the number of corners of the polygon.
-
Sharpness:
-
Increase or decrease the sharpness of the polygon.
The last field displays a preview of your settings.
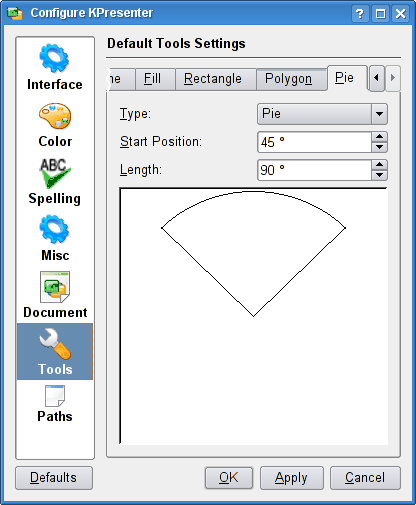
This is used in the
->
->
menu.
-
Type:
-
You can choose among three options in the dropdown box:
Pie
,
Arc
or
Chord
.
-
Start position:
-
Set here the start position.
-
Length:
-
Set the length of your pie.
The last field displays a preview of your settings.
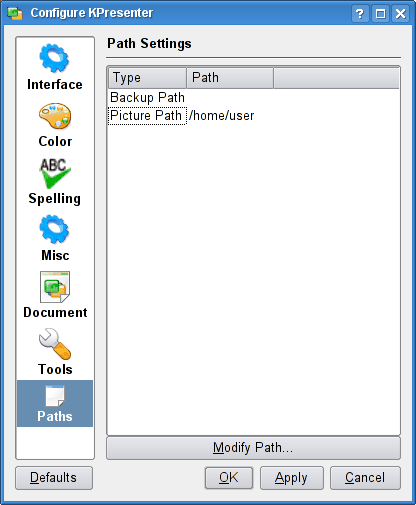
There are two paths that are set here, the
Backup Path
and the
Picture Path
. The
Backup Path
is the directory where your backup files are saved and the
Picture Path
is the directory where your pictures are saved. Highlight a path in order to modify it and click on
Modify Path...
. A small dialog appears and if you uncheck
Default path
, you will be able either to enter a path yourself or to choose one with the standard KDE file dialog.
See the Text-to-Speech section
in the accessibility chapter for further details.
The
Configure Completion
Dialog�
�For Users with Disabilities
|
|
|