|
 |
|
| |
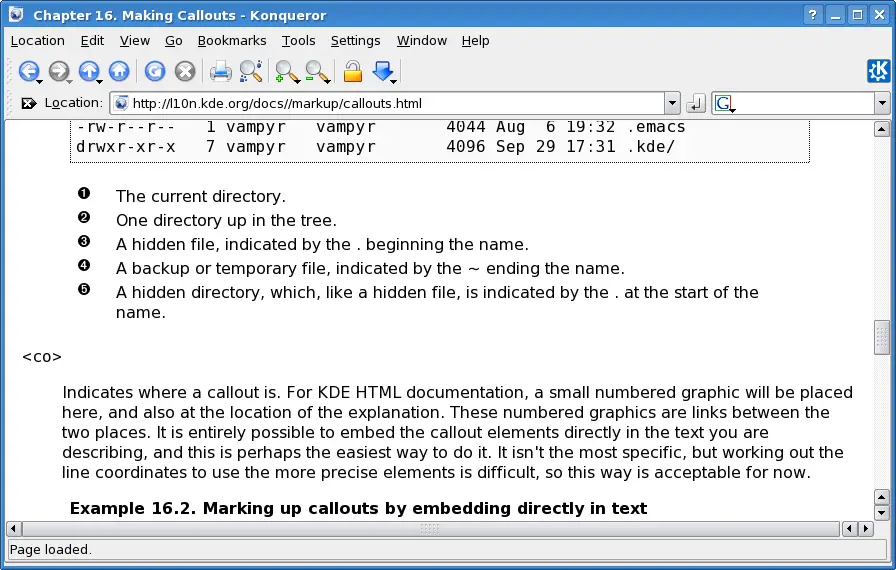
Windows, How To Work Them
Each application running in KDE has its own window, and some
applications may use more than one window. You can manipulate these
windows in many ways to make your desktop work for you. Here is a
normal window:
Switching Between Windows
If you want to use a window, it must be active. A window
automatically becomes active when you open it, so that the application
you opened is immediately ready to use. Only one window can be active
at a time. The active window is the one into which you can type, and can
be distinguished from the others because it has a different colored
titlebar. (With the KDE default theme, the active window has a
light blue
titlebar, and the inactive
windows have
gray
titlebars.)
When you want to work in a different window, you need to make
it active. There are two ways to do this:
-
left mouse button-click on the window that you want to make active. The
window will become active and will be raised above other windows if it
overlaps them.
-
Hold down
Alt
and press
Tab
(do not release the
Alt
key). A popup dialog appears with a list of available windows, one of
which is highlighted. You can select a different window by pressing
Tab
again to move through the list, all the time holding down
Alt
. When you release the
Alt
key, the window which was highlighted
is made active.
The first way to organize the windows on your desktop is to move
them around. You can move windows so that they overlap other windows,
or so that you can see the whole window. There are three ways to move
a window:
-
Click the left mouse button on the window titlebar and hold it down. Move
the mouse cursor and the window moves with it. Release the mouse
button, and the window remains where you left it.
-
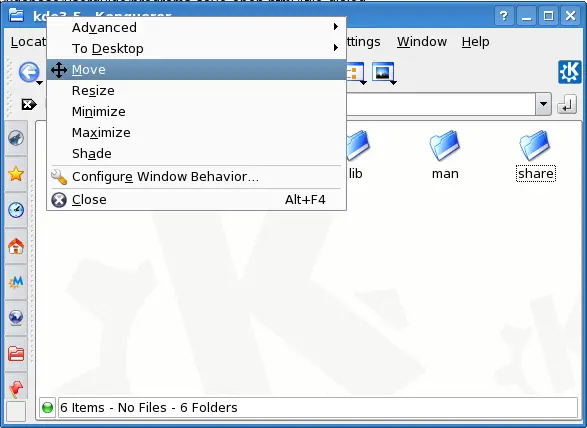
Open the window menu using the leftmost button on the window
titlebar (as displayed below), and select
. The mouse cursor
moves to the center of the current window and by moving the mouse
around, you can move the window. Once you have moved the window to the
position you want, click the left mouse button to release it.
-
Hold down
Alt
and the left mouse button when the mouse cursor is
above the window you want to move. The mouse cursor changes to a
compass, and by moving the mouse, you can move the window. Just
release the mouse button to release the window. This method is
particularly useful if the window titlebar has been moved off the
screen, so you cannot use the other methods.
You can make windows bigger or smaller, wider, or taller in
one of two ways. Just use whichever you are most comfortable with:
-
Move the mouse cursor over the border of the window (it is light
blue in the screenshot above). The pointer will turn into a
double-headed arrow. Click and drag, and the edge of the window
follows the mouse cursor, making the window bigger or smaller. If you
click on the borders on the top or bottom of the window, you can
adjust the height on its own. If you click on the borders on the left
or right of the window, you can adjust the width. To change both at
the same time, move the mouse cursor over the corner of the
window. When the pointer becomes a diagonal double-headed arrow, click
and drag.
-
Use the leftmost button on the window titlebar to display the
window menu. Choose the
entry, and
the mouse pointer will become a double-headed arrow. Move the mouse
cursor around to resize, and click the left mouse button when you are done
to release the window.
-
If you cannot see the window border or the button for the window
menu, you can use
Alt
and the right mouse button: Hold down
Alt
and drag with
the right mouse button. The window will resize. You just release the right mouse button when
you are done.
If you just want to make a window as big as possible, so it
takes up the whole screen, use the
Maximize
button, which is the second
button from the right on the window titlebar. Clicking with the left mouse button
on this button will make the window as big as possible in both
directions; while clicking with the middle mouse button
or the
right mouse button
will increase the window's size in only the vertical or horizontal
direction, respectively.
When you need to keep a program open, but you do not want it to
take up space on your desktop, you can minimize it or shade it. To
minimize a window, click the
Minimize
button,
which is third from the right on the window titlebar. The window will
not be displayed, but the program is still running, and an entry for
it appears in the taskbar on the panel. To display the window again,
click on its entry in the taskbar. You can also use
Alt
+
Tab
: see the section called “Switching Between Windows”.
Shading windows is very similar to minimizing them, but this
time, only the titlebar of the window is shown. To shade a window,
double-click on the titlebar. To restore the window, just double-click
on the titlebar again.
Sometimes you might have a whole lot of windows open and all over the place. By selecting to cascade windows KDE will automatically line them up as a succession from the top-left of your screen. To use this option use your middle mouse button on the desktop, and then select
.
By selecting to unclutter your opened windows KDE will attempt to use the maximum available space of the desktop in order to display as much of each window as possible. For example, should you have four windows open and you request that they be uncluttered, they will each be placed in a corner of the desktop, regardless of where they were originally. To use this option once again use your middle mouse button on the desktop and then select
.
When you finish using an application, you will want to stop
the application and close its window. Once again, you have the choice
of a few options:
-
Click on the rightmost button on the window titlebar.
If you are editing a document with that application,
you will be asked whether you want to
Save
your
changes,
Discard
them, or
Cancel
your command to close the application.
-
Use the
->
option on the menubar. You will be presented with the
same choice of
Save
,
Discard
, or
Cancel
.
-
Right-click on the respective window in Kicker, the KDE panel, and then select
. You will be prompted with an option to save any documents that were being edited.
-
Press
Alt
+
F4
. Once again, the confirmation dialog will be shown if you
were editing any documents.
Advanced Window Management
kstart
The simplest way to access the advanced window management
facilities in KDE is to use a little known
utility called kstart, which is included in KDE since version 2.1 kstart lets you control the way an application interacts with
the window manager. The command is usually
used to define special behavior for commonly-used applications, but
it can also be useful for integrating non-KDE applications into your
desktop.
Using kstart is easy: you simply put
kstart
and some options
before a command. To begin, let's look at how we might use
kstart to customize the behaviour of a
KCalc window. The command we'll use is as follows:
%


kstart


--ontop

--alldesktops

kcalc
With luck, the effect this command has
should be fairly obvious - the kcalc window will stay on top of all
the others and be visible on every virtual desktop. A feature that is
less obvious is that this command will work with any NET compliant
environment, not just KDE.
We can pass arguments to programs we invoke with kstart as normal, for
example:
%


kstart


--skiptaskbar

--desktop

1 xmessage'Hello World'
This command displays Hello
World with xmessage and
ensures that the window will be shown on the first virtual desktop and
will be omitted from the taskbar. The fact that this program is
written using the Xt toolkit rather than being a native KDE
application does not cause any problem for
kstart, hopefully this illustrates how
kstart can be used to integrate foreign
applications into your KDE desktop.
Other Special Window Settings
While you can use kstart to assign particular window settings, KDE also allows you to alter these -- as well as other similar settings -- from the program window itself. Simply select the leftmost button in the window titlebar (or just hit
Alt
+
F3
once the window is focued), and then go to
->
. As you can see, from here you change various things from its geometry upon startup, to whether it should have a border or not.
Now that we know how to customize the decoration of a window
let's take a look at another aspect of the desktop: the system
tray. The system tray is an area in which an application can display a
small window. It is used to display status information or provide
quick access to commands. A window that has an item in the system tray
usually disappears from the task manager when minimised with the tray
icon providing a replacement. Normally tray icons are specifically
developed as part of an application, but as with window decorations,
KDE provides a tool for changing this:
ksystraycmd.
To begin with, we'll take the standard application KCalc and turn
it into a system tray application. This is acheived with one simple
command:
%


ksystraycmd


--title
 'kcalc' kcalc
The icon shown in the tray is the one specified in the window
hints and will be updated if the icon changes. The window title is
shown as a tooltip if you hold the mouse over the icon.
ksystraycmd follows standard KDE
behaviour so the target window can be shown and hidden by clicking the
tray icon, and a standard context menu is available.
More Complex Uses of
ksystraycmd
To illustrate the other features of
ksystraycmd, we'll use a more complicated example: a Konsole window tracking the
.xsession-errors file (this is the log file that records what's
happening on your desktop). To begin with, we'll simply look at how
we can view this:
%


konsole


--icon

log
--caption
 'X Log' \

--nomenubar

--notabbar


--noframe
 \

-e
 tail -f ~/.xsession-errors
The
--caption
and
--icon
arguments are provided as standard by KDE applications. You can get
a full list of these global options by running an application with the
--help-kde
and
--help-qt
parameters. Here we give our Konsole window the title 'X Log' and
the icon “log”. You can use these options with any KDE application and
as mentioned above, ksystraycmd takes account of these when creating
the tray icon. The
-e
argument is specific to Konsole and tells it
to run the
less
command. Despite its complexity, we can easily move
this window into the tray with ksystraycmd:
%


ksystraycmd


--hidden

--title
 'X Log' \
konsole --icon log --caption 'XLog' \
--nomenubar --notabbar --noframe \
-e tail -f .xsession-errors
In addition to being the
most complex command we've used, this example demonstrates the
--hidden
option which starts the command with only the system tray
icon visible. This example achieves our aim of providing quick access
to the log file, but we can do things a little more efficiently if we
only run the konsole process when it is visible. The command we use
is
%


ksystraycmd


--startonshow
 \
 --
icon
 log
--tooltip
 'X Log' \
konsole --icon log --caption 'X Log' \
--nomenubar --notabbar --noframe \
-e tail -f ~/.xsession-errors
The addition of the
--startonshow
parameter tells
ksystraycmd to start with only the tray
icon visible (like the
--hidden
parameter), and to wait until the user
activates the tray icon before running the target command. We've also
used the
--quitonhide
parameter which tells ksystraycmd to terminate
the target app whenever its window is hidden. Using both these
parameters ensures that our Konsole tray icon doesn't waste resources
when we aren't using it. Creating and destroying the target window as
we do here prevents the standard icon and title handling of
ksystraycmd from working, so we now need to
specify the initial icon and tooltip explicitly
too.
In all of our previous examples we've relied on
kstart and
ksystraycmd to figure out which window we
want to affect, and unless we say otherwise, they assume that the first
window to appear is the one we want. This policy is usually OK because
we are starting the application at the same time, but it can fail
badly when lots of windows are appearing (such as when you log on). To
make our commands more robust we can use the
--window
parameter. This specifies the title
of the target window. The following example uses the
--window
parameter
to ensure that a particular konsole window is affected:
%


kstart


--iconify

--window
 'kstart_me' konsole
--caption 'kstart_me' -e tail -f
~/.xsession-errors
Here we've used the tried and tested technique of specifying a
title for both kstart and the target application. This is generally
the best way to use kstart and ksystraycmd. The
--window
argument is
supported by both kstart and
ksystraycmd
and can be regular expression
(e.g. “window[0-9]”) as well as a particular title. (Regular
expressions are a powerful pattern matching tool you'll find used
throughout KDE.)
Sometimes, one screen's worth is just not enough space. If you
use many applications at the same time, and find yourself drowning in
different windows, virtual desktops offer the solution. By default,
KDE has four virtual desktops, each one of which is like a separate
screen: you can open windows, move windows around, and set backgrounds and
icons on each of the desktops. If you are familiar with the concept of
virtual terminals, you will have no trouble with KDE's virtual
desktops.
Switching Virtual Desktops
To move to a different virtual desktop, you can use
Ctrl
+
Tab
in the same way as you would use
Alt
+
Tab
to switch between windows (see the section called “Switching Between Windows”): Hold down
Ctrl
and then press
Tab
. A small popup window appears, showing the virtual desktops,
with one highlighted. If you release
Ctrl
, KDE will switch to the
highlighted virtual desktop. To select a different desktop, press
Tab
repeatedly, while holding down
Ctrl
. The selection moves
through the available desktops. When the desktop you want to switch to
is highlighted, release
Ctrl
.
Windows and Virtual Desktops
You can move windows around your virtual desktops with the
item in the window menu: just
select the desktop to which you want to move the window. You can make the
window appear on all desktops with the
item.
Getting Help�
�The File Manager
|
|
|