Follow Techotopia on Twitter

On-line Guides
All Guides
eBook Store
iOS / Android
Linux for Beginners
Office Productivity
Linux Installation
Linux Security
Linux Utilities
Linux Virtualization
Linux Kernel
System/Network Admin
Programming
Scripting Languages
Development Tools
Web Development
GUI Toolkits/Desktop
Databases
Mail Systems
openSolaris
Eclipse Documentation
Techotopia.com
Virtuatopia.com
Answertopia.com

How To Guides
Virtualization
General System Admin
Linux Security
Linux Filesystems
Web Servers
Graphics & Desktop
PC Hardware
Windows
Problem Solutions
Privacy Policy


6.7.  Unsharp Mask

Revision History
Revision $Revision: 1.22 $ 2006-11-26 j.h

6.7.1.  Overview

You can find this filter through Filters->Enhance->Unsharp Mask.

Out-of-focus photographs and most digitized images often need a sharpness correction. This is due to the digitizing process that must chop a color continuum up in points with slightly different colors: elements thinner than sampling frequency will be averaged into an uniform color. So sharp borders are rendered a little blurred. The same phenomenon appears when printing color dots on paper.

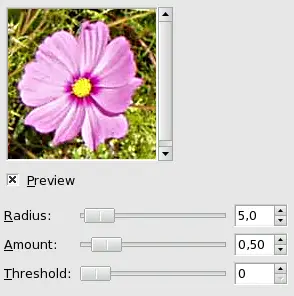
The Unsharp Mask filter (what an odd name!) sharpens edges of the elements without increasing noise or blemish. It is the king of the sharpen filters.

Some scanners apply a sharpen filter while scanning. It's worth disabling it so that you keep control on your image.

Figure 11.96.  Applying example for the Unsharp Mask filter

Applying example for the Unsharp Mask filter

6.7.2.  Options

Figure 11.97.  Unsharp Mask” filter options

Unsharp Mask filter options
Preview

Parameter setting results are interactively displayed in preview. Scroll bars allow you to move around the image.

Parameters setting

  • Radius: slider and input boxes (0.1-120) allow you to set how many pixels on either side of an edge will be affected by sharpening. High resolution images allow higher radius. It is better to always sharpen an image at its final resolution.

  • Amount: slider and input boxes (0.00-5.00) allow you to set strength of sharpening.

  • Threshold: slider and input boxes (0-255) allow you to set the minimum difference in pixel values that indicates an edge where sharpen must be applied. So you can protect areas of smooth tonal transition from sharpening, and avoid creation of blemishes in face, sky or water surface.

6.7.3.  More information

To prevent color distortion while sharpening, Decompose your image to HSV and work only on Value. Then Compose the image to HSV. Go to Image/Mode and click on Decompose. Make sure the Decompose to Layers box is checked. Choose HSV and click OK. You will get a new grey-level image with three layers, one for Hue, one for Saturation, and one for Value. (Close the original image so you won't get confused). Select the Value layer and apply your sharpening to it. When you are done, with that same layer selected, reverse the process. Go to Image/Mode and click on Compose. Again choose HSV and click OK. You will get back your original image except that it will have been sharpened in the Value component.


  Published under the terms of the GNU General Public License Design by Interspire