The Scale Tool is used to scale layers, selections or paths (the
Object).
When you click on image with the tool the Scaling Information dialog box
is opened, allowing to change separately Width
and Height.
At the same time a Preview with a grid or an outline is superimposed
on the object and handles appear on corners that you can click and drag
to change these dimensions. A small circle appears at center of the
Preview allowing to move this preview.
4.5.2. Activate Tool
The Scale Tool can be called in the following
order, from the image-menu:
Tools->Transform Tools->Scale
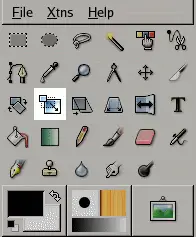
The Tool can also be called by clicking the tool icon:
or by using the
Shift-T
key combination.
4.5.3. Key modifiers (Defaults)
Ctrl
Holding Ctrl will constrain the scale
height.
Alt
Holding Alt will constrain the scalewidth.
If Alt doesn't work, try Shift+Alt.
4.5.4. Options
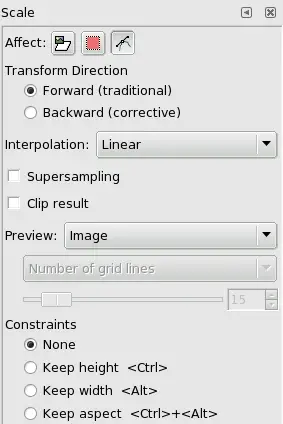
Figure 8.50.
Scale tool options
Overview
The available tool options for the Scale Tool can be accessed by
double clicking the Scale Tool icon.
Affect
Affect icons let you choose the element, current layer,
selection or path, the tool will transform:
The Transform layer lets you
modify the size of the selection and its
content (the whole layer if there is
no selection.
The Transform selection lets you
modify the size of the selection
boundaries.
The Transform path lets you
modify the size of the current path.
These three buttons associate the remainder of the
options to one of those three elements.
Warning
Remember that the Affect option persists when you quit the
tool.
Transform Direction
Forward (Traditional):
The Forward mode will scale the object as one might expect: with
an enlarged preview, the object will be rendered enlarged.
Backward (Corrective):
Performs transformation in the reverse direction: a reduced
object will be rendered enlarged and conversely.
Interpolation
The
Interpolation
drop-down list allows you to choose the quality of the
transformation. For more information about the different methods
that can be employed, see the glossary entry
Interpolation.
This option will clip the transformated image to the original
image size.
Preview
Here, Preview is superimposed on the image. The drop-down list
gives you four possibilities:
Outline:
Puts a frame to mark the image outline, with a handle on
each corner. Movements will affect this frame only.
Grid:
Puts a grid on the image, with four handles. Movements
will affect this grid only.
Image:
Here, the preview is a copy of the image superimposed on
the image, with an outline. Movements affect this copy and
the underlying image appears.
Grid+Image:
Both turn at the same time.
Preview type is only for greater convenience. Whatever your
choice, result will be the same when you clic on the
Scale
button in the Scale Informations dialog.
Options with grid activate a drop-list with two options:
Number of Grid Lines
will allow control over the total number of displayed grid lines.
Use the slider to set the number of grid lines.
Grid Line Spacing
allows control over the distance between the grid lines. Use the
slider to set the distance.
Note
When scaling a path, Preview options are not valid: only Outline
is active.
Constraints
None:
No Height/Width constraint will be imposed to scaling.
Keep Height
will constrain the scale such that the height of the layer will
remain constant.
Keep Width
will constrain the scale such that the width of the layer will
remain constant.
Keep Aspect
will constrain the scale such as the Height/Width ratio of the
layer will remain constant.
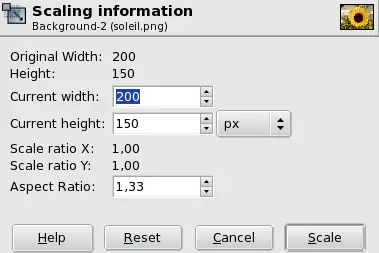
The Scaling Information dialog window
Figure 8.51.
The Scaling Information dialog window
Original Width/Height
Here, the width and height of the original object are displayed.
Actual Width/Height
Here, you can set width and Height you want to give to the
object. The default unit of measurement is pixel. You can
change it by using the drop-down list.
Scale ratio X/Y
The origine/actual width/height ratios are displayed here.
Aspect ratio
The actual width/height ratio is displayed here.
Published under the terms of the GNU General Public License


![[Warning]](../images/warning.png)
![[Note]](../images/note.png)