4.3.4 Transparency as a Tool for Editing Masks
To effectively edit masks, the image layer must be partially visible
behind the mask so that it can be used as a guide for editing. The
semi-transparency of channel masks was discussed in
Section
4.3.1, but how is it done for layer
masks? It is done by using the
Opacity slider in the Layers dialog. The following example
demonstrates its use.
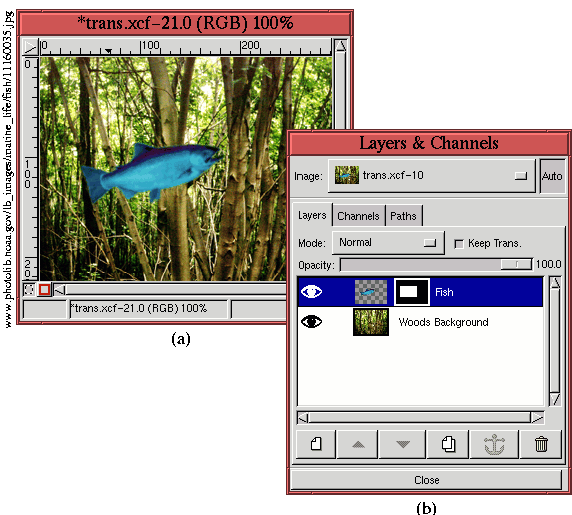
Figure
4.27
Figure 4.27:
Image with Two Layers and a Layer Mask
 |
illustrates an image consisting of two layers. The Layers dialog
shown in Figure
4.27(b) shows that the lower layer is
a photo of a woods and the upper layer an image of a fish, on an
otherwise transparent layer. The upper layer also has a layer mask,
which is to be used to edit the fish image.
The goal is to make parts of the fish transparent to create the
illusion that the fish is partially behind some of the trees in the
woods. This can be done with the layer mask by painting with black on
the desired areas of the mask (see Section
4.3.1) or by
cutting away parts of the mask with a selection (see
Section
4.3.2). However, to effectively edit the
layer mask using either approach, you must be able to see the outline
of the trees through the fish. This is achieved by making the Fish
layer active and, then, lowering the value of the Opacity slider.
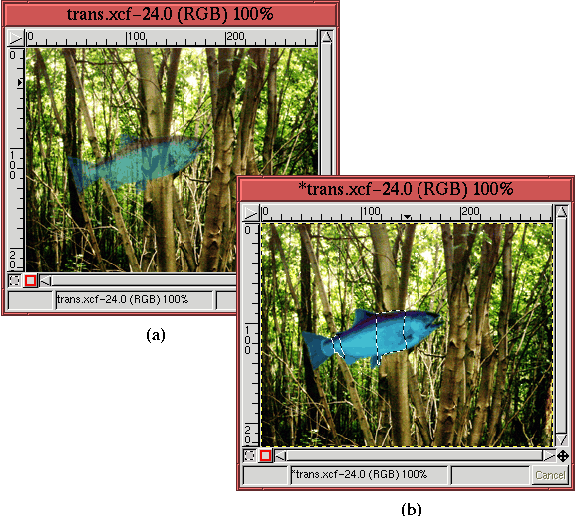
Figure
4.28(a)
Figure 4.28:
Decreasing the Opacity of the Top Layer and the Selection
Obtained Using the Bezier Path Tool
 |
illustrates the effect of lowering the Fish layer's opacity. Because
the trees can be perceived through the fish, it is easy now to edit
the layer mask to achieve the desired effect. The result of using the
Bezier Path tool to make a selection is shown in
Figure
4.28(b) (note that the opacity of the Fish
layer has been reset to 100%).
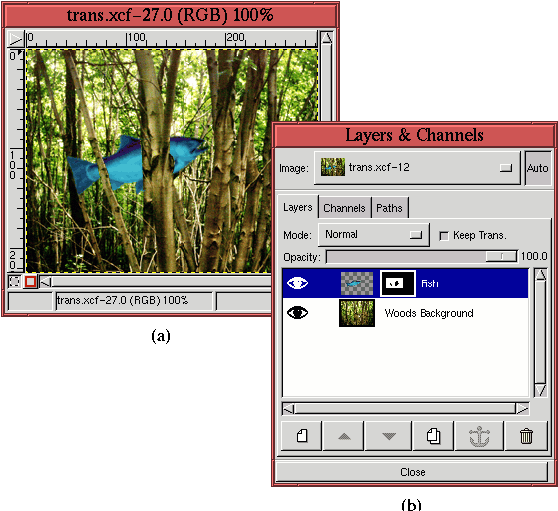
Making sure that the Active Background Color in the Toolbox is set to
black and that the layer mask is active in the Layers dialog, the
selection is cut by typing C-x in the image window. The result
on the image is shown in Figure
4.29(a),
Figure 4.29:
The Result of Editing the Layer Mask
 |
and the thumbnail of the resulting mask can be seen in
Figure
4.29(b).


