Contributing a preference page
The
org.eclipse.ui.preferencePages
extension point allows you to contribute
pages to the general preferences
Window > Preferences
)
dialog. The preferences dialog presents a hierarchical list of user preference
entries. Each entry displays a corresponding preference page when selected.
The readme tool uses this extension point to add the Readme Example preferences page.
   <extension
      point = "org.eclipse.ui.preferencePages">
       <page id="org.eclipse.ui.examples.readmetool.Page1"
	    class="org.eclipse.ui.examples.readmetool.ReadmePreferencePage"
            name="%PreferencePage.name">
       </page>
   </extension>
This markup defines a preference page named "Readme Example" which is implemented by the class
ReadmePreferencePage. The class must implement the
IWorkbenchPreferencePage
interface.
The workbench uses the core runtime's preference mechanisms to access all nodes in the preference tree
and their corresponding pages. This list can be initialized from information in the preferences service
without running any plug-in code.
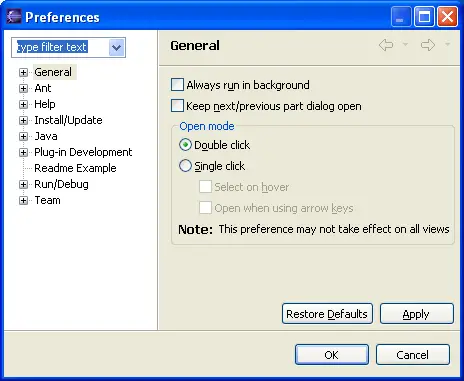
The "Readme Example" preference is added to the top level of the
preference tree on the left. Why? Because a preference page contribution will be added as a root of the tree unless a
category attribute is specified. (The name category is somewhat misleading.
Perhaps a better name is
path.) The category attribute
specifies the id (or a sequence of ids from the root) of the parent page. For example, the following markup would create a second readme tool preference page, "Readme Example Child Page," as a child of the original page.
   <extension
      point = "org.eclipse.ui.preferencePages">
      <page
         id="org.eclipse.ui.examples.readmetool.Page1"
         class="org.eclipse.ui.examples.readmetool.ReadmePreferencePage"
         name="%PreferencePage.name">
      </page>
      <page
         id="org.eclipse.ui.examples.readmetool.Page2"
         class="org.eclipse.ui.examples.readmetool.ReadmePreferencePage2"
         name="Readme Example Child Page"
         category="org.eclipse.ui.examples.readmetool.Page1>
      </page>
   </extension>
Once the user selects the entry for a preference page in the tree on the left,
the workbench will create and display a preference page using the class specified in the
extension definition. This action is what activates the plug-in (if it
wasn't already activated due to another user operation).


